Confined Space Asphyxiation

By ThinkReliability Staff

During the overnight shift on November 5, 2005, two workers at a refinery in Delaware City, Delaware died from asphyxiation.  Both workers had entered a confined space that was filled with nitrogen.  We will use information from the Chemical Safety Board’s root cause analysis investigation to create a Cause Map.  A thorough root cause analysis built as a Cause Map can capture all of the causes in a simple, intuitive format that fits on one page.

The first step in our analysis is to define the problem by filling out the outline.  The outline contains the what, when, where and impact to the goals.  The “what” is the problem; in this case two workers were asphyxiated.  The when is the overnight shift of November 5, 2005, and the where is the hydrocracker reactor of a Delaware City refinery.  The workers were apparently attempting to retrieve dropped tape.

Because two workers were killed, there was an impact to the safety goal.  There may have been impacts to other goals as well, but the loss of life makes other impacts less significant.

Once the outline is completed, we use the impacted goal to begin the Cause Map.  We begin with the impacted goal and ask ‘why’ questions.  A good way to begin is using the “5-why” technique.  Begin with the impacted goal and ask “why” 5 times.  This will start the Cause Map.  For this incidence: the safety goal was impacted. Why? Because two workers died.  Why? Because they were asphyxiated.  Why? Because they entered a confined space.  Why?  They were attempting to retrieve lost tape.  Why?  Because the tape was left in the reactor.

From the “5-why” Cause Map we can add more detail to the root cause analysis.  Additional causes can be added before, after and between the causes on the 5-why map.  For example, the workers were asphyxiated because they entered the confined space AND the space was filled with nitrogen.  The space being filled with nitrogen is added as an additional cause of asphyxiation, and is joined with “AND” because both causes had to be present for the asphyxiation to occur.

Even more detail can be added to this Cause Map as the root cause analysis continues. As with any investigation the level of detail in the analysis is based on the impact of the incident on the organization’s overall goals. The outline, “5-why” Cause Map and detailed Cause Map can be seen by clicking “Download PDF” above.

Yellow Fever Epidemic

By ThinkReliability Staff

With swine flu in the news lately, ‘epidemic’ has been on many minds. However, there is still much that isn’t understood about swine flu. There are other epidemics that we understand much better, such as yellow fever.  Yellow fever has been causing epidemics for a long, long time.

But how does it happen?  We can do a root cause analysis of a yellow fever epidemic to find out.  A thorough root cause analysis built as a Cause Map can capture all of the causes in a simple, intuitive format that fits on one page.

Since we are not looking at a specific event, but rather a general situation we will start with just one impacted goal. A yellow fever epidemic can result in the deaths of thousands of people, which we will consider an impact to the safety goal.

We begin the root cause analysis with this impacted goal and ask “why” questions.  Several thousand people may die because there is no cure for yellow fever, it has a high mortality rate, and several thousand people get infected.  The people get infected because they’re not vaccinated, and they are bitten by an infected mosquito in the epidemic zone.  (The endemic zone is areas of Africa and South America where a low level of yellow fever is always present.  The epidemic zone is an area outside the endemic zone to where yellow fever is spread and an epidemic occurs.)

People are not vaccinated because they don’t have access to the vaccine: either it costs too much, or the area is to isolated to receive vaccine. In order for someone to get bit by an infected mosquito in the epidemic zone, the mosquito must be infected, and the person must have been exposed to a mosquito in the epidemic zone.  In order for a person to be exposed to a mosquito, the mosquito must have access to a person, and mosquitoes must exist, meaning they are able to breed, meaning breeding pools exist.

A mosquito gets infected by biting a person infected with yellow fever. For yellow fever to spread from the endemic zone to the epidemic zone, this means a person was infected with yellow fever in the endemic zone,
and traveled to the epidemic zone.  The person gets infected with yellow fever by being bitten by a mosquito infected with yellow fever (in the endemic zone) without being vaccinated.  The person gets bitten by an infected mosquito because they are exposed to mosquitoes (for the same reasons listed above) that are infected, usually by biting monkeys who have been infected by yellow fever.

If you had trouble following all of that, you can see why a process map would be helpful.  On the downloadable PDF, both the Cause Map and process map are shown.

Pedestrain Bridge Collapse on July 4th

Download PDFBy ThinkReliability Staff

On the evening of July 4th, after watching fireworks, revelers at a park in Merrillville, Indiana headed back to their cars over a pedestrian bridge.  The bridge became overloaded and collapsed when two suspension cables snapped.  Somewhere between 50 and 120 people fell into the lake.  Although 25 were treated for injuries, nobody was killed, thanks to quick action by nearby lifeguards, police officers, firefighters and other rescuers who formed a human chain to help get everyone safely out of the water.  We’ll use this as an root cause analysis example.  A thorough root cause analysis built as a Cause Map can capture all of the causes in a simple, intuitive format that fits on one page.First we complete the outline.  The problem is a bridge collapse.  It happened at 10:00 p.m. on the 4th of July, while there were large numbers of people on the bridge.  It was a pedestrian bridge in Merrillville, IN, and people were crossing it to return home after a party.

Once we have defined the problem we list the impacts to the goals.  People being injured is an impact to the safety goal, as is the potential for drowning.  People fell into the lake, which was an impact to the customer service goal.  Additionally, the loss of the bridge is an impact to the material and labor goal.

We begin our Cause Map by listing the impacted goals and asking “why” questions to fill out the Cause Map to the right.  Begin with 5 “why” questions to start the Cause Map.  This is known as the “5-whys” technique.  For example, the safety goal was impacted.  Why? The safety goal was impacted because people were injured.  Why? People were injured because they fell into the lake.  Why?  They fell into the lake because the bridge collapsed. Why?  The bridge collapsed because the suspension cables broke.  Why? The cables broke because the weight on the bridge exceeded the bridge capacity.

Even more detail can be added to this Cause Map as the analysis continues. As with any investigation the level of detail in the analysis is based on the impact of the incident on the organization’s overall goals.  For this investigation, we can add some more detail to the “5-why” Cause Map to help our investigation.  For example, pedestrians fell into the lake because the bridge collapsed AND because pedestrians were on the bridge, returning to their cars after the 4th of July party.

There may have been additional stress on the bridge due to pedestrians jumping up and down, as reported by witnesses.  Additionally, we can add more detail after the “weight exceeded capacity” on the bridge.  The bridge was built to hold 40 people, but “at least twice that” were on the bridge when it collapsed.  So many people were on the bridge because they were returning to their cars (as discussed above), and because of ineffective crowd control.  There were too many people on the bridge despite officers stationed on either side.  Why was the crowd control ineffective?  It’s not known at this point, but we’ll put a question mark here.  The next step of the investigation will be to replace that question mark with reasons for the ineffective crowd control.  Once we’ve done that, we can come up with solutions that will keep an event like this one from occurring in the future.

Italian Train Explosion

Download PDFDownload PDFBy ThinkReliability Staff

On the evening of June 29, a train carrying liquefied natural gas derailed and exploded in the town of Viareggio, in western Italy.  Search and rescue operations are still ongoing, and the cause for the derailment is not yet known.  Although that means we are lacking some information, we can still begin our root cause analysis investigation, in the form of a Cause Map.  A thorough root cause analysis built as a Cause Map can capture all of the causes in a simple, intuitive format that fits on one page.

The benefit to beginning a root cause analysis investigation before all the information is known is to provide a framework for the investigation to build on.  People find it much easier to comment on a partially finished Cause Map than to piece together the investigation from scratch.

A root cause analysis template is available for download from the Think Reliability web page to assistant with the investigation.  The first step is to fill out the outline.  Don’t leave any blanks in the outline; if you don’t know something, put a question mark.  The first line is the ‘what’ or the problem.  Rather than spending time debating what ‘the problem’ is, we can put a number of things.  For example, the problem here could be defined as a gas leak, an explosion, and a train derailment.  We put all these things on the problem line.  The rest of the information is known, though we may add more detail later, except for differences.  Differences can be key to an investigation.  For example, if you have a process that works for 30 straight sunny days, then fails the day it rains, it is worth looking into the impact of the rain on the process.  Here, no differences are immediately coming to mind, so we’ll put a question mark in this blank.

Once we’ve defined the problem, we can define the problem with respect to the impact to the goals.  We don’t know how many people, overall, were killed or injured, but we can just put “at least” to show that the numbers aren’t exact.  We know that the environmental goal was impacted, because of the gas leak, the community goal was impacted because of the required evacuation, and the material/labor goal was impacted because of the collapsed houses, and the damage to the train.

Now we begin the analysis.  We begin with the impacted goals and ask “why” questions, moving to the right.  When we can’t answer the “why” question, we can use a question mark, or put some possibilities (theories) that have been presented.  For example, we’re not yet sure why the train derailed.  Some of the possibilities that have been presented are damage to the tracks, a problem with the braking system, or malfunctioning wagon locks.  The Cause Map (so far) is shown in the downloadable PDF (to download, click “Download PDF” above.)  As you can see, there is a lot of information present, even though we don’t know all of what happened yet.

As more information is available, we can update the Cause Map.  As with any root cause analysis, the level of detail in the analysis is based on the impact of the incident on the organization’s overall goals.

D.C. Metro Train Collision

Download PDFBy ThinkReliability Staff

On June 22, 2009, the Washington, D.C. area suffered its first fatal Metro train crash since 1982.  A transit train smashed into another train that was stopped on the tracks.  There has been an apparent increase in crashes in large city’s transit systems over the last several months, causing some to question whether enough is being done to ensure an attitude of safety.  Robert Lauby, a former NTSB investigator, said:

“Just because you had them doesn’t mean there’s a specific issue that caused them.”

Actually, that’s exactly what it means.  If something happens (an effect), there has to be a cause.  Usually there’s more than one cause.  We can look at this incident in a root cause analysis to determine what some of the causes were.  A thorough root cause analysis built as a Cause Map can capture all of the causes in a simple, intuitive format that fits on one page.

The official investigation is still in its infant stages, but we can still put together a pretty thorough Cause Map.  (See the Cause Map by clicking on “Download PDF” above.)  We can add more detail to this Cause Map as the investigation continues. As with any investigation the level of detail in the analysis is based on the impact of the incident on the organization’s overall goals.

First we define the problem.  Here, it’s that two trains crashed.  We also enter the other identifying information (date, location and process.)  Then we frame the problem with respect to the impacts to the goals.  Here, the safety goal was impacted because at least 9 people were killed and at least 76 were injured.  The material goal was impacted because of severe damage to the trains.

Next, we do the root cause analysis.  We begin with the impacted goals and ask “why” questions to find all the causes of the incident.  People were killed and injured because of the damage to the trains.  The trains were damaged because of a train, which was moving at a “considerable speed”  rear-ending a stopped train, and because of the  inadequate crashworthiness of the moving train.

The train was not adequately crashworthy because it was old, and not replaced (despite an NTSB recommendation to replace or retrofit the older cars to increase safety in a crash).  Why weren’t they replaced?  We don’t know yet, but the NTSB will be talking to Metro’s administration to find out.

The two trains collided because the train that was rear-ended was stopped on the tracks, waiting for another train to move.  The train that struck it did not stop or slow down.  The striking train was not equipped with a data recorder and the operator was killed in the incident, so we don’t have a very good idea of what happened.  But we can come up with some theories and then refine or reject them as evidence permits.  Since the train didn’t stop, it’s either because there was no attempt to stop, or the braking system malfunctioned.  From the information we have available, it appears that a train would not attempt to stop if the operator was unaware of the train, because she couldn’t see it and because the sensor system was not working properly,  AND if the mechanical override system was not working.  The sensor system not working might cause the mechanical override system to not work, OR the system could have been overridden by either the dispatcher or the operator.  (Apparently having the train in manual may turn off the mechanical override.)

We can continue to add to our root cause analysis as we get more information on the accident.

Preventing Runway Incursions at LAX

Download PDFBy ThinkReliability Staff

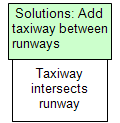
Enterprising companies know that finding new, effective solutions to problems makes good business sense.  Finding new solutions can be the difficult part.  A root cause analysis can help find new, effective solutions.  To demonstrate this capability, we’ll look at the problem of runway incursions at Los Angeles International Airport (LAX).  In 2007, there were 21 incursions at LAX.  Perhaps the problem was discussed, and it was determined that one of the causes of these incursions was that the taxiways intersected the runways.  This is shown below in a Cause Map, or visual root cause analysis.

Runway CM1

A potential solution, then, is to install a taxiway between the runways, so that they don’t intersect.

Runway CM2

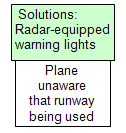
This solution has been implemented at LAX, with the result of runway incursions dropping to 5 so far this year.  However, LAX officials would like that number to fall even further.  So they started looking for new solutions.  Finding new solutions may mean adding more detail to the Cause Map.  For example, what if we add another cause for runway incursions?

Runway CM 3

This gives us another cause that we can try to “solve”.  Here, the solution being implemented at LAX is radar-equipped warning lights.  Essentially, if the system senses a plane or vehicle that could lead to a potential collision on a runway or taxiway, the runway lights turn red.  If not, they are green.  The plane still has to request clearance from traffic control, but it adds another layer of protection.

Runway CM 4

Officials at LAX hope this will continue to decrease the number of incursions at LAX.  If not, the root cause analysis can be built into even more detail, and more solutions can be found.

Loss of submarine KURSK

Download PDFBy ThinkReliability Staff

On August 12, 2000, a torpedo exploded on KURSK, leading to the eventual loss of the submarine and all on board.  We can demonstrate the causes of the KURSK tragedy by performing a visual root cause analysis, or Cause Map.  A thorough root cause analysis built as a Cause Map can capture all of the causes in a simple, intuitive format that fits on one page. First we define the problem(s).  Here, the problems include a torpedo explosion and submarine sinking.  This is the “what”.  The initial explosion on KURSK ocurred at 11:28 a.m. on August 12, 2000.  This is the “when”.  The KURSK (a Russian attack submarine) was in the southern Barents Sea, performing a torpedo firing drill.   This is the “where”.  We’ll also frame this incident with respect to the impact to the goals.  The safety goal was impacted because all 118 sailors on board were killed.   The materials goal was impacted because of the loss of the submarine.  There are other goals that were impacted, but for our basic analysis, we will stop here.

Next we perform the analysis portion of the root cause analysis. We can begin by using the “5-Whys” technique.  We start with the impact to the safety goal, and ask “why” 5 times.  For example: Why was the safety goal impacted?  Because 118 sailors died.  Why?  Because of the explosion of missiles and torpedo fuel.  Why did the missiles and torpedo fuel explode?   Because of the impact when the submarine hit the bottom of the ocean.  Why did the submarine sink? A torpedo exploded, breaching the hull.  Why?   A fuel leak on the torpedo.  The resulting Cause Map is shown on the downloadable PDF.  Though the resulting Cause Map is accurate, it’s not complete.

We can add additional causes to make our map more complete.  For example, although 95 sailors were killed directly by the explosion, the remaining 23 sailors actually died from carbon monoxide poisoning because they were trapped in the aft compartment due to the submarine sinking.

A higher detail Cause Map is also shown on the downloadable PDF.  Even more detail can be added as the root cause analysis investigation continues.  The level of detail in a Cause Map is determined by the impact to the organization’s goals.  Because of the tragically high number of deaths in this incident, it will be worked to a very high detail.  The highest detail level Cause Map has more than 150 causes.

Eschede Train Derailment

Download PDFBy ThinkReliability Staff

June 3, 1998, a train derailed and crashed into a bridge near Eschede, Germany, killing 101 people, including 2 engineers who had been working on the bridge.  A thorough root cause analysis built as a Cause Map can capture all of the causes of this tragedy in a simple, intuitive format that fits on one page.We can begin our analysis with the “5 Whys” technique, asking “Why” 5 times.  1) Why did the train crash into a bridge?  It derailed.  2) Why did it derail?  A tire embedded in the railcar changed the switch.  3) Why was the tire embedded?  It had come off the wheel.  4) Why did the tire come off the wheel?  The tire broke.  5) Why did the tire break?  Fatigue cracking.  This forms the beginning of a root cause analysis investigation.

As we continue the investigation, we can create a more detailed root cause analysis.  We begin by defining the problem in terms of the impacts to the organization’s goals.  The safety goal was impacted because of the 101 deaths, and 88 injuries.  Also, the train suffered serious damage, resulting in an impact to the materials/labor cost goal.  These impacts to the goals form the basis for our Cause Map.

eschede-thumbnailThe goals were all impacted due to the destruction of the rear railcars.  This occurred because the train crashed into a bridge at 200 km/hour.  The train was not stopped or slowed because of company policy to investigate an  issue first.  The train crashed into the bridge because it had derailed because a tire embedded in the railcar collided with a switch guard rail.  The tire became embedded because it broke, due to fatigue cracking from wear and inadequate inspections, and an insufficient design.  The design was insufficient because the prototypes were not physically tested and dynamic repetitive forces were not considered in the modeling.

Even more detail can be added to this Cause Map as the analysis continues. As with any investigation the level of detail in the analysis is based on the impact of the incident on the organization’s overall goals.  Once the Cause Map is completed to the desired level of detail, solutions can be found for any of the cause boxes.  Solutions are then shown with the cause they control.

Pool Safety

Download PDFBy ThinkReliability Staff

Many of the examples of Cause Maps are investigations of an incident that has already taken place.  However, cause maps are also very useful as a proactive, preventative tool.  A thorough root cause analysis built as a Cause Map can capture all of the potential causes of concern in a simple, intuitive format that fits on one page.  Let’s say you have decided to get a pool for your household.  A Cause Map can help you identify the potential hazards of pool ownership, provide solutions for them when possible, and ensure that your pool experience is as safe as possible.

Preventing pool injuries is extremely important.  About 43,000 people each year are injured in and around swimming pools and 600 people drown.  Of the 600, approximately 260 are children under the age of 5.  Half of pool drownings occur in the yards of single-family homes.  Obviously, drowning is a concern when discussing pool safety, but the other top causes of injuries around pools are head injuries, slipping, and electrocution.  Some solutions to these problems are listed below, and are based on causes derived from the Cause Map. (To see the Cause Map, click on “Download PDF” above.)

POOL SAFETY SOLUTIONS:

1) Control access to the pool by using a self-latching, self-locking fence that is at least 4′ tall, that can’t be climbed.  Ensure the doors open outward from the pool and have a latch out of children’s reach.   Use a safety cover when the pool is not in use.
2) Employ drain safety devices such as pumps that shut off automatically when the pipes are obstructed.
3) Keep children within arm’s reach when near a pool.  Don’t put in a pool for your family until your children are at least 5.
4) Keep lifesaving equipment near the pool, including a hook and an approved life-saving flotation device.
5) Don’t drink & swim, and don’t let those who have consumed alcohol near the pool.
6) Take your whole family to swimming lessons.
7) Never swim alone.  Don’t let anybody else swim alone.
8) Use a pool alarm that senses water motion to determine if someone has entered the pool.  Make sure it is always turned on when the pool is not in use.
9) If a child is missing, look first in the pool (most children who drown are found after 10 minutes).
10) Keep a telephone, and emergency numbers, near the pool at all times.
11) Check the water depth before diving, or don’t allow diving in your pool.
12) Learn CPR.  Take your whole family (when they’re old enough) to CPR lessons, too.
13) Don’t allow running near the pool.
14) Use an absorbent material to surround the pool.
15) Use rough material around the pool (such as cement instead of tile).
16) Stay out of the pool during rain or lightning storms.
17) Keep electrical appliances away from the pool (they can cause electrocution even if they are not turned on).

Emergency Landing of American Airlines Flight 268

Downlaod PDFBy ThinkReliability Staff

On September 22, 2008 American Airlines Flight 268 en-route from Seattle to JFK Airport made an emergency landing at Chicago’s O’Hare Airport.  Nobody was injured, although the landing gear sustained some damage.  In order to determine what went wrong, we will perform a root cause analysis.  A thorough root cause analysis built as a Cause Map can capture all of the causes in a simple, intuitive format that fits on one page.First we’ll look at the impact to the goals.  An emergency landing is an impact to the customer service and production/schedule goal.  Additionally, the damage to the landing gear is an impact to the material/labor cost goal. We begin with the impacts to the goals, then ask “Why” questions to fill out the Cause Map.  For example, the damage to the landing gear occurred because the pilot steered the plane off the side of the runway.  The pilot steered the plane off the runway because of an obstruction at the end, and because of control issues, which occurred because of a failure of multiple cockpit systems.  The failure of these systems also caused the emergency landing.

The failure of the cockpit systems was caused by the battery power being depleted and not being recharged.  This occurred because the battery was powering four systems, and was disconnected from the main battery charger.  This happened because the standby power selector switch was moved to the “BAT” (or battery) position.  The standby selection switch was moved to battery because that is what procedure called for when the “Standby Power Bus OFF” light is illuminated.  The light was illuminated due to a relay failure, of unknown cause.

At this point, a problem becomes clear.  A pilot following procedure should not result in an emergency landing for a plane.  Thus, we have a procedural problem.  We will use a Process Map to draw out a procedure for more clarity to see where the specific issue lies.

Based on general information presented by the National Transportation Safety Board (NTSB), the illumination of the “Standby Power Bus OFF” light indicates a loss of power to the standby AC or DC bus.  If this occurs, the standby power selection knob should be turned to “BAT” (battery).  The battery should provide standby bus power. If the “Standby Power Bus OFF” light goes out, the standby power selection knob should be turned to “AUTO” which restores the battery charger.

Written in a paragraph, it can be difficult to see where the issue is.  But if we put it in a Process Map, we see a decision box for “Standby Power Bus OFF light remains illuminated.  If the answer is yes, we follow the procedure outlined above.  But if the answer is no, there is no procedure to follow.  This is the position the pilot of Flight 268 was in.  The “Standby Power Bus OFF” light went out, so the pilot left the standby power selection knob on “BAT”.  This drained the battery, resulting in the failure of various cockpit systems, as discussed above.

Even more detail can be added to this Cause Map as the root cause analysis continues. As with any investigation the level of detail in the analysis is based on the impact of the incident on the organization’s overall goals.